Docs / Getting started
Your first case in 10 minutes
This walkthrough takes a case from nothing to submission-ready. If you haven’t gone live yet, you’re in the trial workspace: follow the same steps on sample data, using the sample document library in place of uploads.
1. Make sure you have a location
Cases belong to a location (your PTAN). If you skipped this during onboarding, go to Locations and add one — name, address, PTAN, NPI, and jurisdiction/MAC. Takes a minute, needed once.
2. Create the case
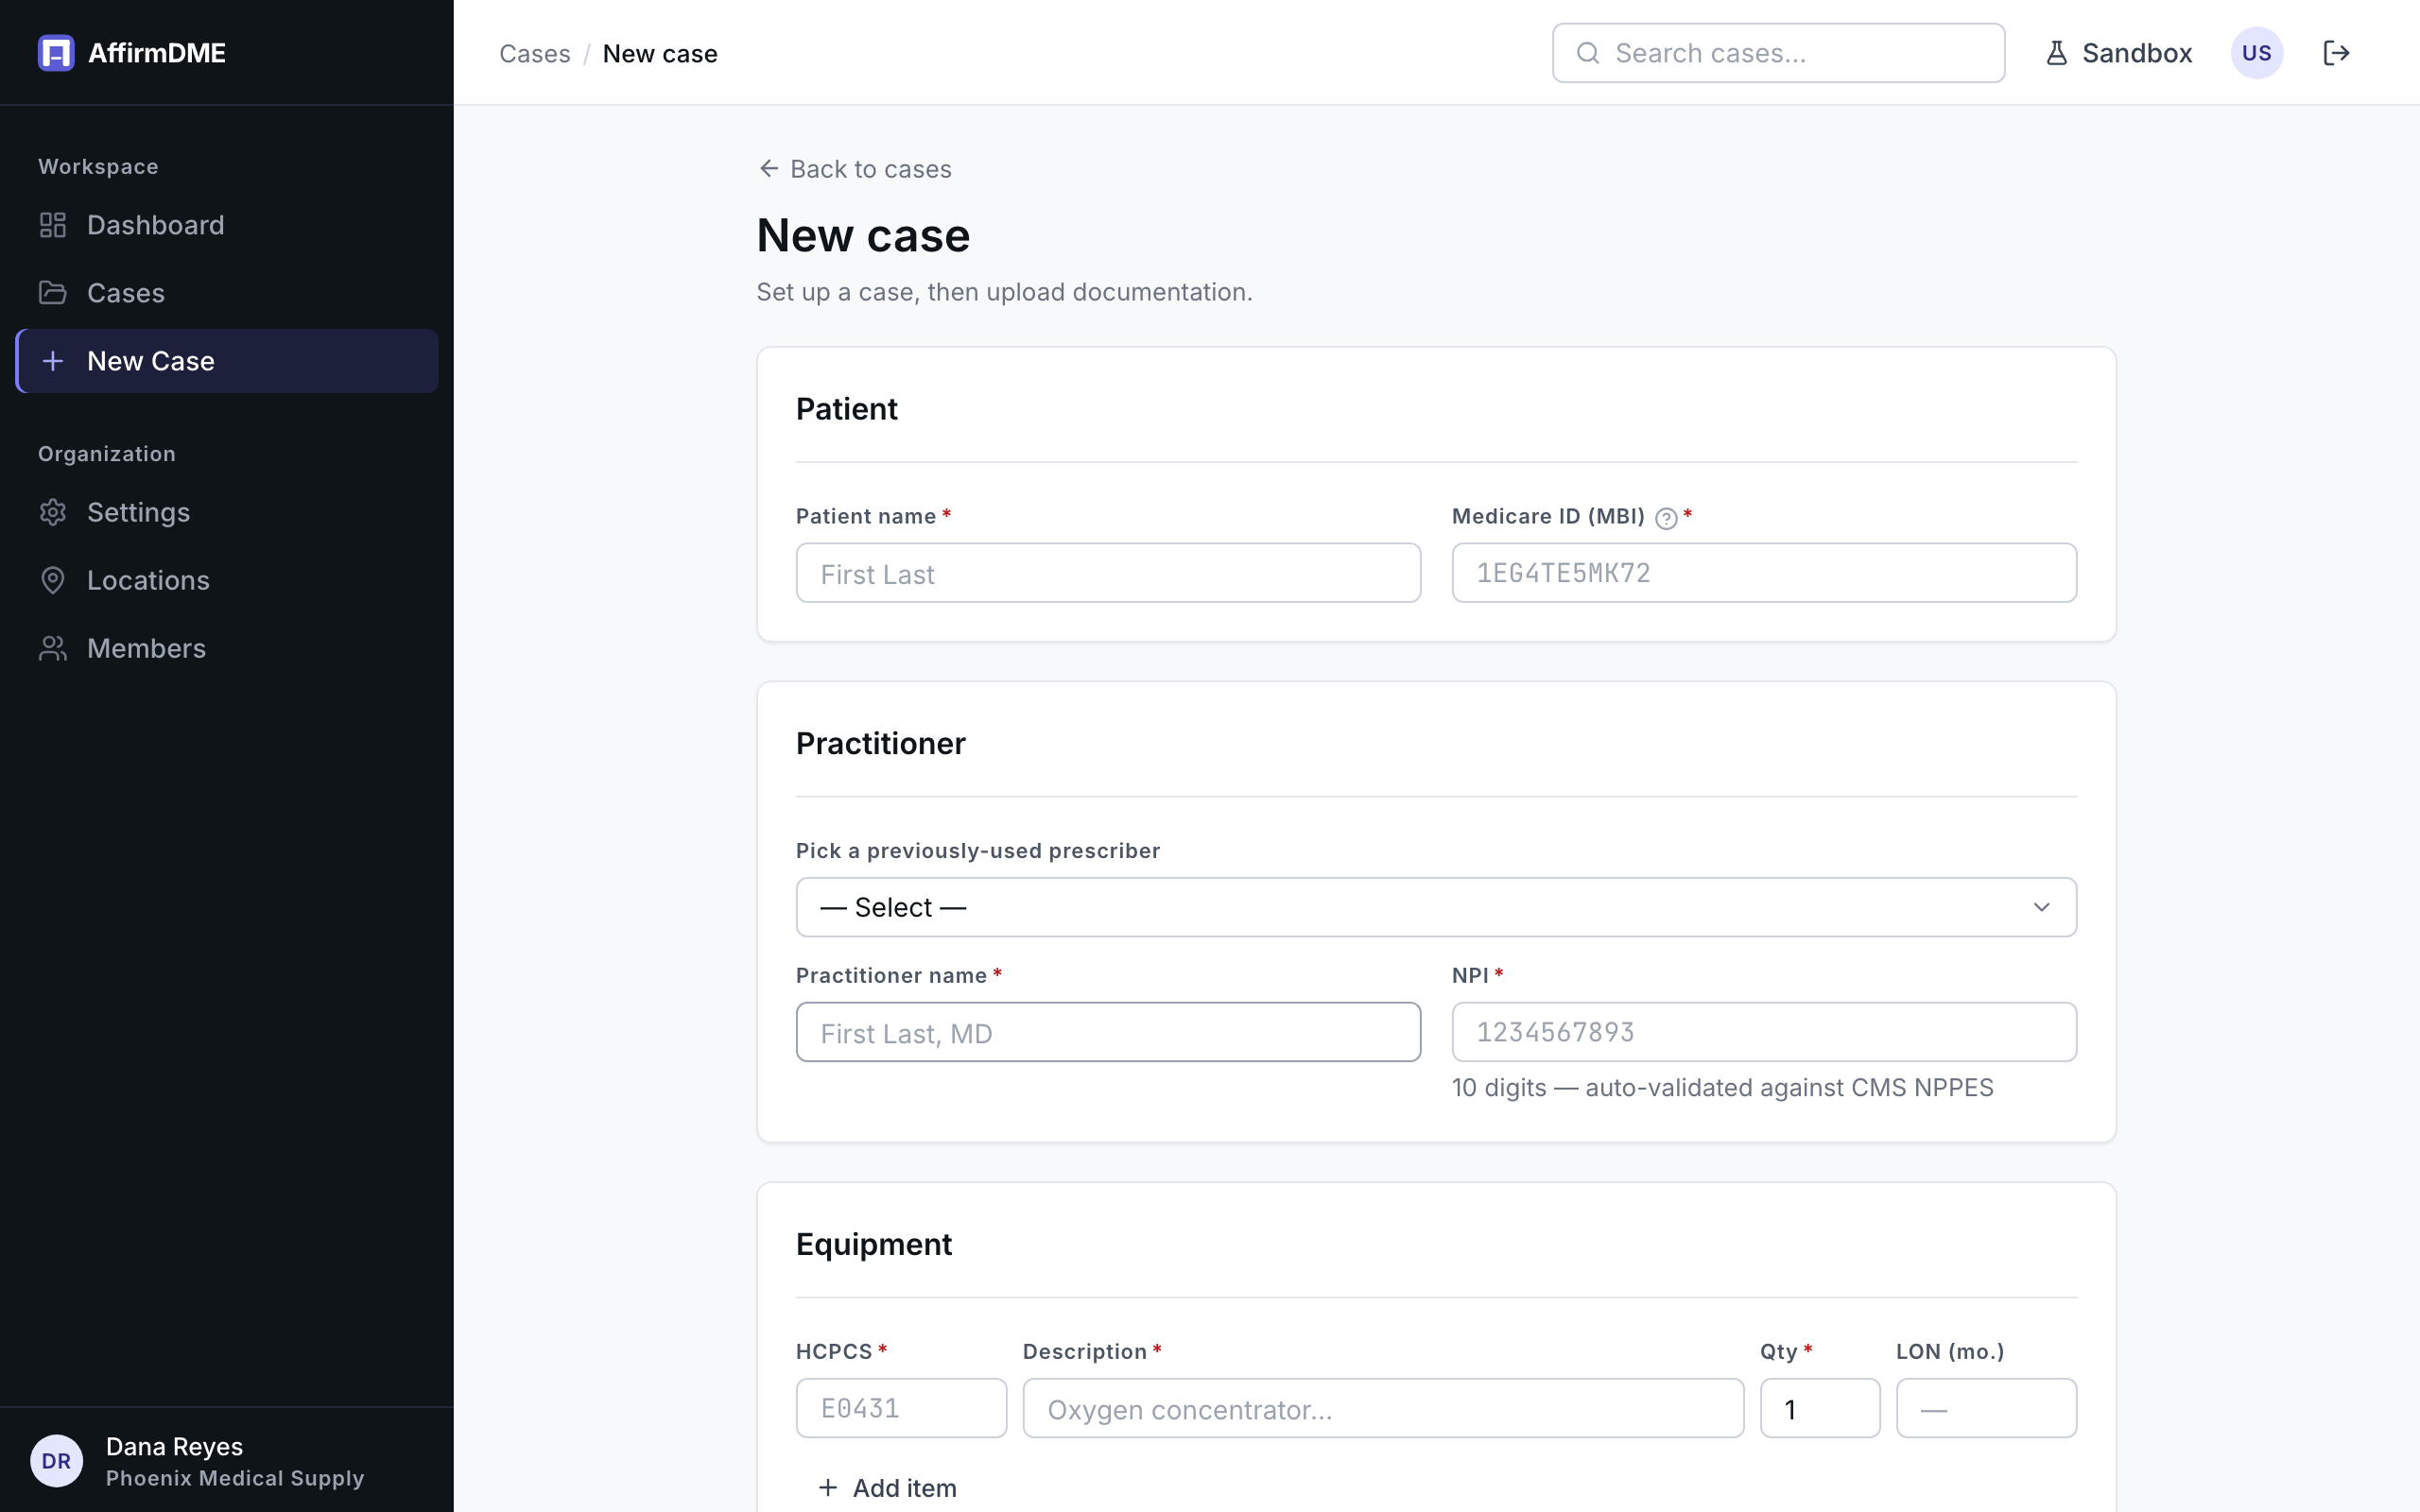
Click New Case and fill in:
- Patient — name and Medicare ID (MBI, the format like
1EG4-TE5-MK72on the Medicare card) - Practitioner — the ordering prescriber’s name and 10-digit NPI (validated against CMS’s NPPES registry as you type; previously used prescribers appear in a picker)
- Equipment — HCPCS code, description, quantity, and length of need (in months) for rentals
- Case details — payer, and your location (jurisdiction and DME MAC fill from it)
3. Upload your documents
Open the case and add the documentation you have — typically the written order, chart notes, and any test results (sleep study, blood gas). Drag PDFs in; each one is classified by type and queued for extraction. Extraction usually finishes in under a couple of minutes per document.
4. Read the checklist
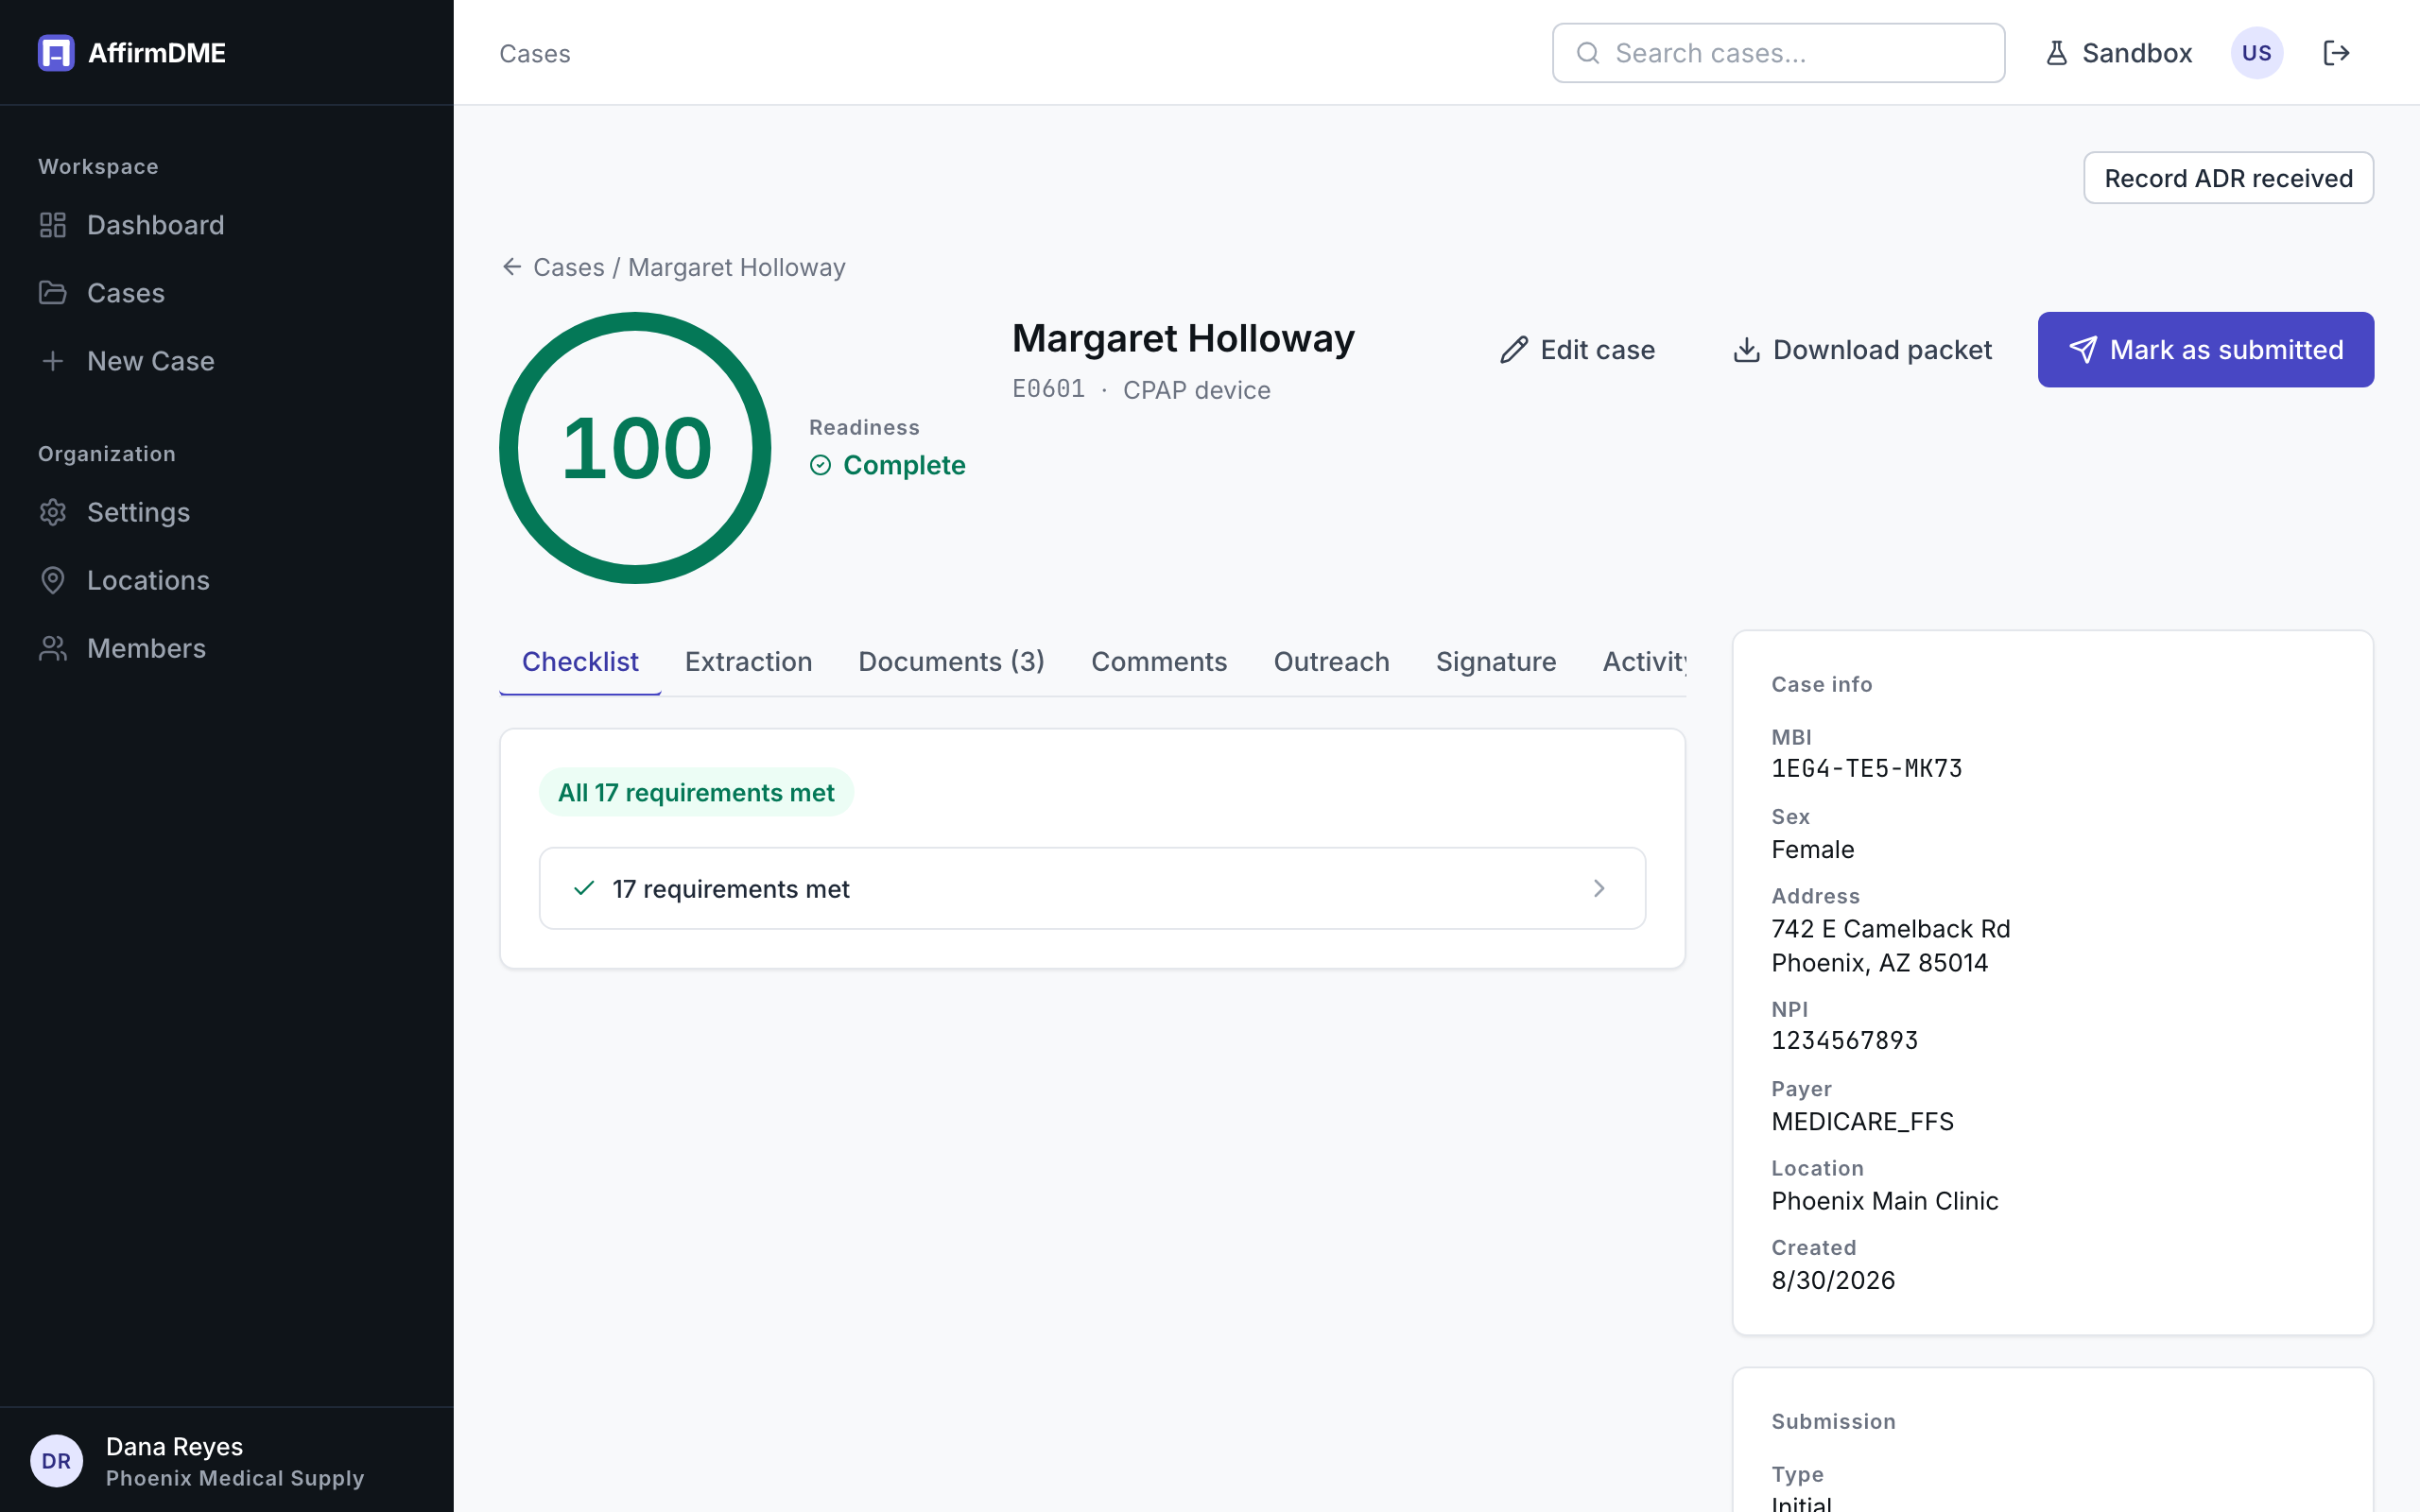
The Checklist tab lists every requirement Medicare applies to your declared equipment — the universal order/encounter rules plus the equipment-specific criteria — each marked Met, Missing, or Needs review, with the citation. The score circle and RED/YELLOW/GREEN readiness summarize it.
Missing something? Each item tells you what document satisfies it. Upload it, or use prescriber outreach to fax the office for records.
5. Submit
When the case reads Ready, click Download packet to get the assembled PDF for your MAC portal submission, then Mark as submitted and record the UTN when it’s issued. When the decision comes back, record it on the case — that’s what powers your affirmation-rate dashboard.